
Chicken Shashlik is a fiery fusion of flavor and color—a dish that beautifully marries marinated chicken with crisp, garden-fresh vegetables. For home cooks and garden-to-table enthusiasts alike, learning how to cook chicken shashlik in the oven means discovering a simple, mess-free way to enjoy a traditionally grilled dish, right from your kitchen.
This comprehensive guide will walk you through each stage—from prepping vibrant ingredients to achieving a perfect char in your oven. Whether you’re hosting a gathering or preparing a wholesome family dinner, this recipe guarantees satisfaction on every skewer.
Step 1: Gather Your Ingredients
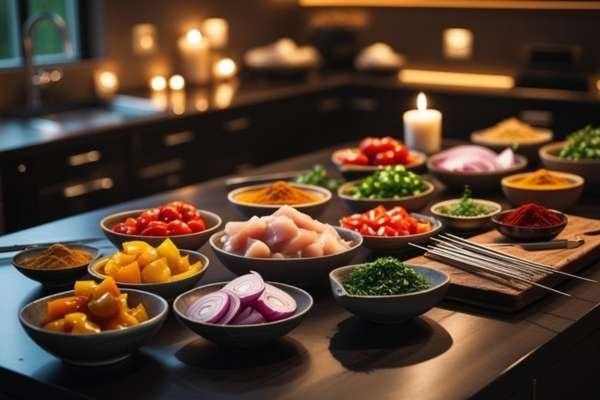
Before you begin, ensure all your ingredients are fresh, firm, and full of natural flavor. Here’s what you’ll need:
Protein:
- 500g boneless chicken (breast or thigh), cut into 1.5-inch cubes
Vegetables:
- 2 bell peppers (choose a mix of red, green, or yellow), chopped into large chunks
- 1 medium onion, sliced into square pieces
- 1 firm tomato, deseeded and diced
- Optional additions: Try mushrooms for earthiness, zucchini for a tender bite, or pineapple chunks to introduce a touch of natural sweetness.
For the Marinade:
- ½ cup plain yogurt
- 1 tbsp ginger-garlic paste
- 1 tsp red chili powder
- 1 tsp cumin powder
- 1 tsp paprika
- ½ tsp turmeric
- 1 tsp garam masala
- 1 tbsp lemon juice or white vinegar
- Salt to taste
- 1 tbsp oil (vegetable or olive)
Step 2: Marinate the Chicken

This stage is where the magic begins. The spices will infuse the chicken with bold, layered flavor.
- In a large mixing bowl, whisk together all the marinade ingredients until you achieve a smooth, well-blended mixture.
- Incorporate the chicken cubes into the marinade and toss well to ensure each piece is evenly coated.
- Cover the bowl and refrigerate for at least 2 hours, or overnight for deeper infusion.
Pro tip: Don’t skip the yogurt—it helps tenderize the chicken while balancing the spices.
Step 3: Prepare the Skewers

Creating visually appealing skewers is just as important as the taste.
- If you’re using wooden skewers, soak them in water for 30 minutes to prevent burning in the oven.
- Alternate the ingredients: Start with a bell pepper chunk, then chicken, followed by onion, tomato, and repeat.
- Leave small gaps between pieces to ensure even cooking and heat circulation.
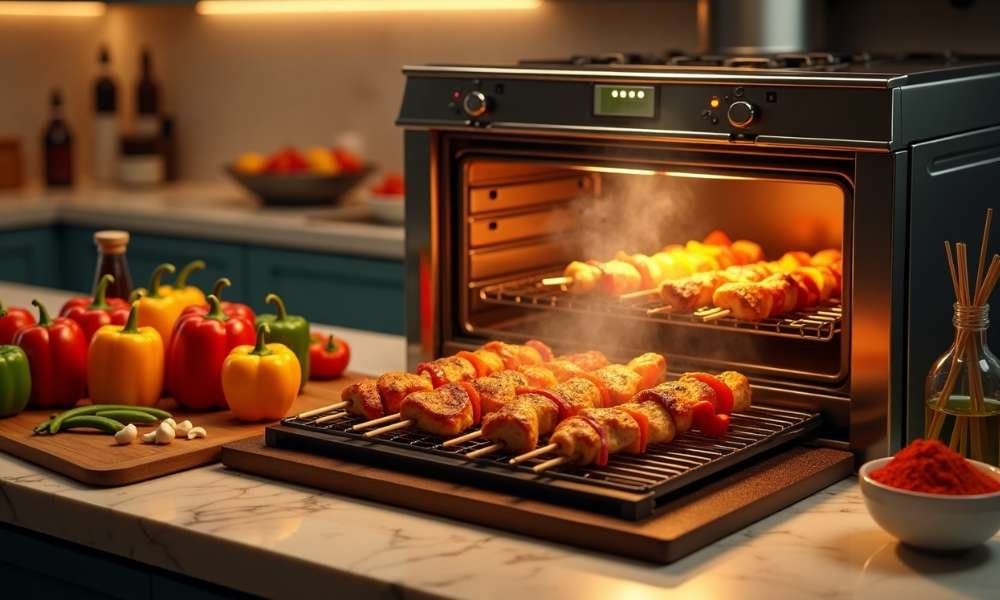
Step 4: Preheat the Oven

Get your oven ready for a high-heat roast:
- Set the temperature to 425°F (220°C).
- Cover a baking tray with a layer of parchment paper or aluminum foil.
- Place a wire rack on top of the tray—this elevates the skewers, allowing heat to surround each one evenly and preventing sogginess.
Step 5: Bake the Shashlik
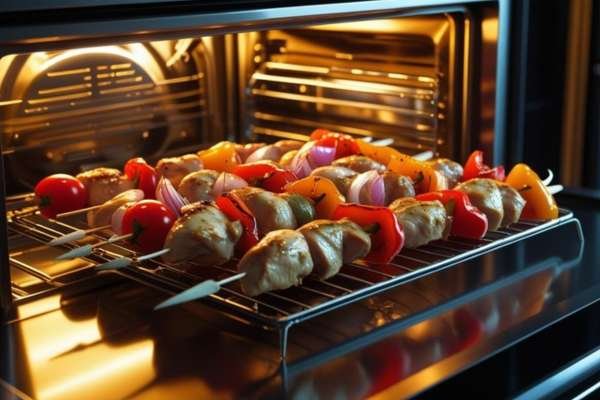
Now is the time to bring tastes into life:
- Arrange the skewers on the rack, leaving space between each one.
- Bake for 20–25 minutes, turning halfway through.
- At the 10-minute mark, brush lightly with oil or reserved marinade (only if it hasn’t touched raw chicken).
Note: The chicken should be fully cooked and lightly golden before broiling.
Step 6: Broil for Char (Optional but Recommended)
For that signature charred edge, finish under the broiler.
- Turn your oven to broil mode for the last 2–3 minutes.
- Watch carefully—natural sugars in the marinade tend to caramelize and can scorch in seconds.
- This step adds a smokier flavor and crisp texture, mimicking grill lines.
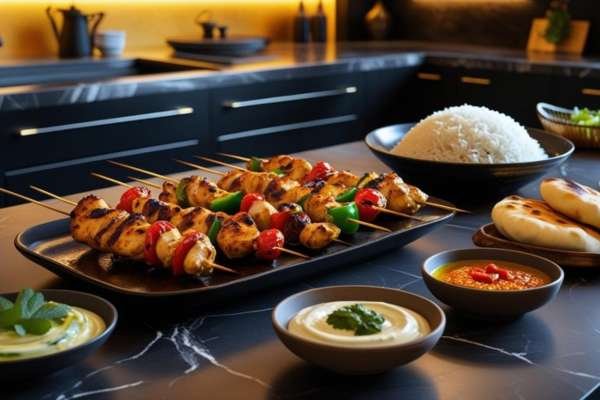
Step 7: Rest and Serve
Let your skewers rest for a few minutes outside the oven to lock in juices.
Serve with:
- Steamed basmati rice or warm naan bread
- A crisp cucumber-onion salad or shredded lettuce
- Dips like mint yogurt chutney, chili garlic sauce, or tamarind dip for contrast
Conclusion
Knowing how to cook chicken shashlik in the oven allows you to recreate a traditionally smoky dish in a more accessible and mess-free way. Bursting with juicy chicken, colorful vegetables, and bold spices, it’s a meal that delights both the eyes and the palate. With just a few simple ingredients and careful steps, your oven becomes the stage for a vibrant culinary show. Serve hot, share generously, and let the flavors speak for themselves.
Learning to cook chicken breast in the oven is simple yet essential. With the right prep and seasoning, you’ll enjoy tender, juicy results perfect for any meal, time and again.